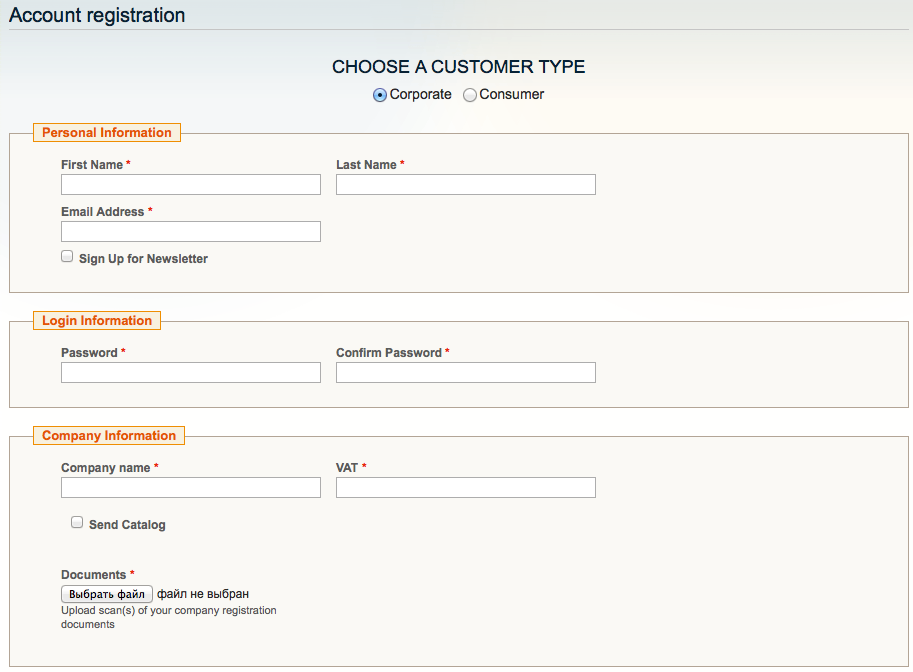
Customer Registration with Group Selector
Let's learn how to create customer registration with group selector like this one:
-
You create separate form for each registration group. Note that fields like First name, Last name, E-mail and Passwords are predefined and you don't need to add them to your forms.
-
Configure web-forms for group registration, see the following page
- If you need to activate the customer manually after registration read the following
- After you configured forms, you create a new CMS page and insert the following code in Content where 112 and 111 are form ID numbers for appropriate Corporate and Individual user groups. You can see these ID numbers in Manage Forms admin page. Lets set your URL key for the page 'registration', you can change it to whatever you need later.
<center>
<h2 style="text-transform:uppercase">Choose a customer type</h2>
<p style="font-size:1.2em">
<input name="customer-type" type="radio" onclick="$('corporate').show();$('consumer').hide();"/> Corporate
<input name="customer-type" type="radio" onclick="$('corporate').hide();$('consumer').show();"/> Individual
</p>
</center>
<div id="corporate" style="display:none">
{{widget type="webformscrf/widget_form" webform_id="112" template="webformscrf/register/default.phtml"}}
</div>
<div id="consumer" style="display:none">
{{widget type="webformscrf/widget_form" webform_id="111" template="webformscrf/register/default.phtml"}}
</div>
- After that you go to Catalog > URL Rewrite Management and click Add URL Rewrite
Choose Type = Custom , ID Path = registration , Request Path = customer/account/create, Target Path = registration (that is your CMS page URL key).
That's all , your CMS page should be shown instead of the default registration page.