Customer Registration Add-on
Installation
You need to have WebForms Pro 3 installed prior to this add-on installation.
Install the package with commands:
composer require mageme/module-webforms-3-customer-registration
php bin/magento module:enable MageMe_WebFormsCustomerRegistration
php bin/magento setup:upgrade
Update
Update the package with commands:
composer update
php bin/magento setup:upgrade
Remove
Uninstall the package with command:
composer remove mageme/module-webforms-3-customer-registration
Sample forms
You can import sample forms using Import Form in the Manage Forms page:
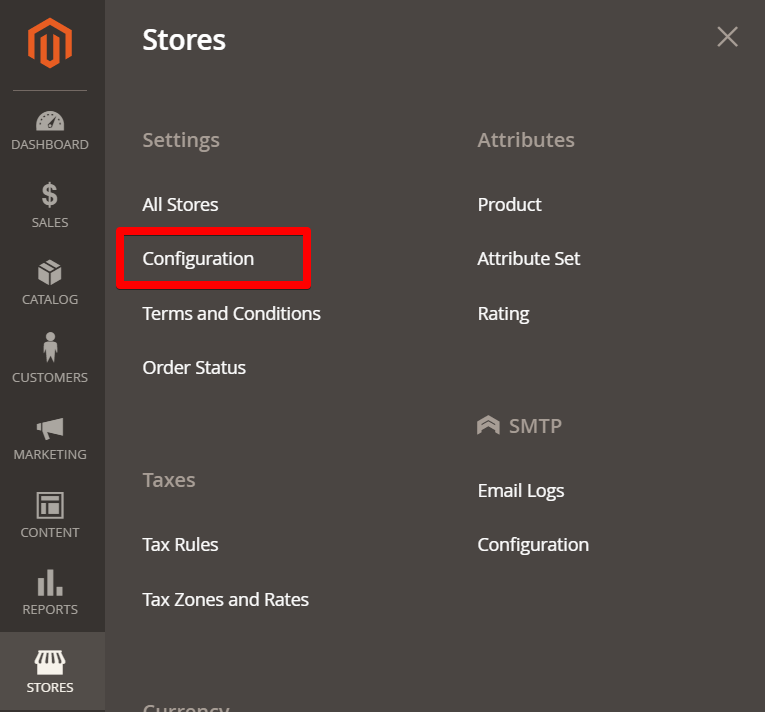
System Configuration
You can access the system configuration through the Stores > Configuration > WebForms admin page.
Customer Registration Add-on
This block of parameters controls the default Magento registration form.
Replace registration form
Replace default registration form under cusomer/account/create controller.
Registration form
Select custom form to replace default registration page.
Form Configuration
Edit the form on Manage Forms page and select the Customer Regsitration Settings tab to access registration parameters.
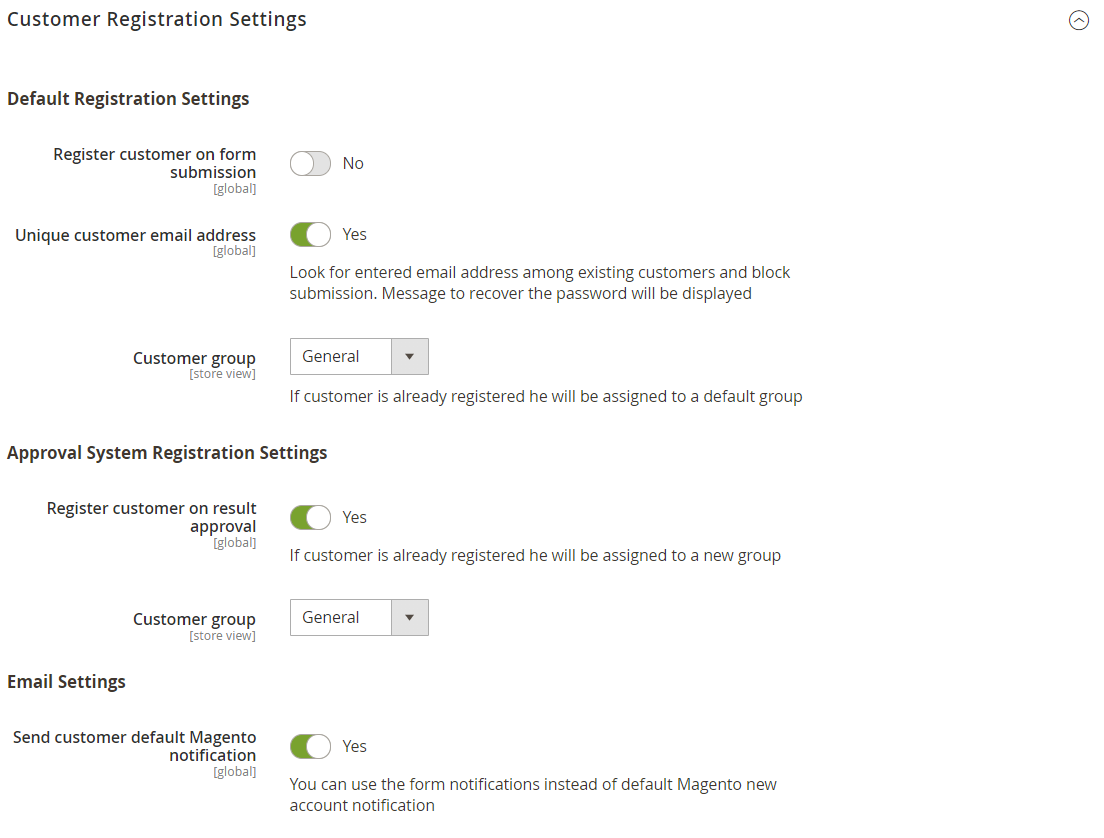
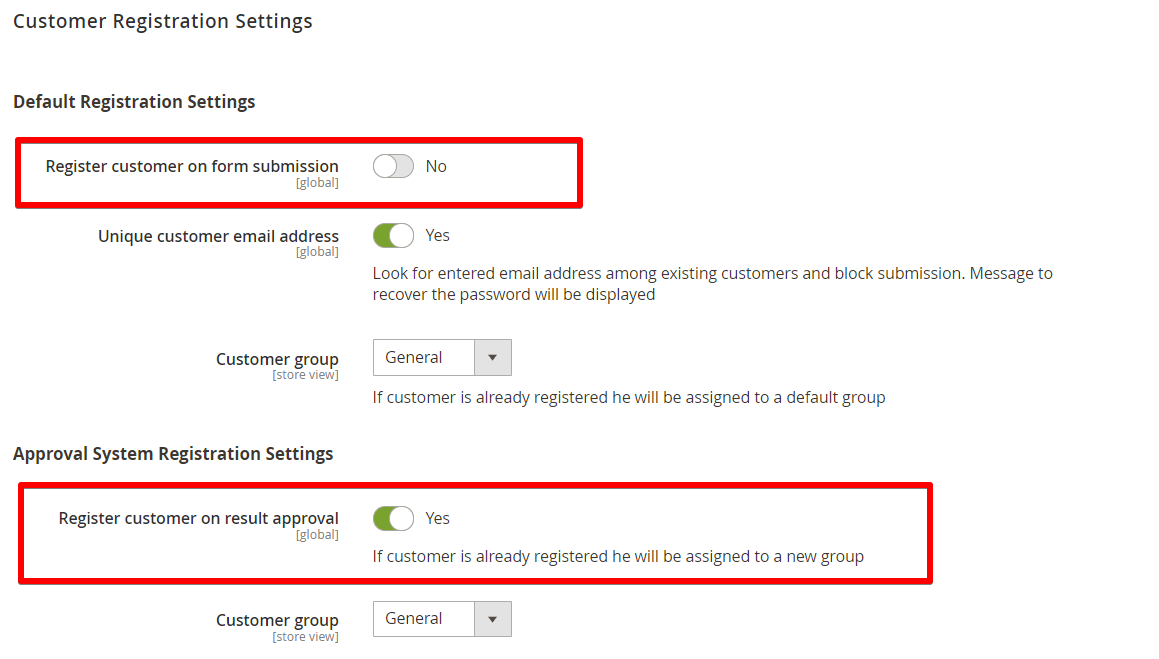
Default Registration Settings
Register customer on form submission
Create customer account on form submission. Please enable this option if you want to register customer without approval or if you want to create account in a temporary customer group.
Unique customer email address
Look for entered email address among existing customers and block submission. Message to recover the password will be displayed.
Customer group
Select the group you would like the new customer to be associated. If the customer e-mail is already registered he will be assigned to the selected group.
Approval System Registration Settings
Please make sure the Result Approval is enabled.
Register customer on result approval
Enable this option if you want the customer account to be registered after approval of the submission. If the customer account was already registered, this will move the customer to selected group instead of creating new account.
Customer group
Select the group which should be associated with the customer after submission approval.
Email Settings
Send customer default Magento notification
Use this option if you want to turn off default Magento welcome email. You can use the form custom notifications instead of the default Magento new account notification.
Customer Attribute Mapping
Please map all required attributes to form fields in order to create valid customer account.
The following list of customer attributes is supported.
| Attribute | Code | Required |
|---|---|---|
| Name Prefix | prefix | |
| First Name | firstname | ✓ |
| Middle Name/Initial | middlename | |
| Last Name | lastname | ✓ |
| Name Suffix | suffix | |
| ✓ | ||
| Date of Birth | dob | |
| Tax/VAT Number | taxvat | |
| Gender | gender | |
| Password | password |
If you don't map the Password the system will automatically generate the random password for the new customer account.
Billing Address Attributes Mapping
Please map all required attributes to form fields in order to create valid billing address.
The following list of address attributes is supported.
| Attribute | Code | Required |
|---|---|---|
| Name Prefix | prefix | |
| First Name | firstname | ✓ |
| Middle Name/Initial | middlename | |
| Last Name | lastname | ✓ |
| Name Suffix | suffix | |
| Company | company | |
| Street Line 1 | street | ✓ |
| Street Line 2 | street | |
| City | city | |
| Country | country_id | ✓ |
| State/Province | region | |
| Zip/Postal Code | postcode | ✓ |
| Phone Number | telephone | ✓ |
| Fax | fax | |
| VAT Number | vat_id |
Shipping Address Attributes Mapping
Please map all required attributes to form fields in order to create valid shipping address.
The following list of address attributes is supported.
| Attribute | Code | Required |
|---|---|---|
| Name Prefix | prefix | |
| First Name | firstname | ✓ |
| Middle Name/Initial | middlename | |
| Last Name | lastname | ✓ |
| Name Suffix | suffix | |
| Company | company | |
| Street Line 1 | street | ✓ |
| Street Line 2 | street | |
| City | city | |
| Country | country_id | ✓ |
| State/Province | region | |
| Zip/Postal Code | postcode | ✓ |
| Phone Number | telephone | ✓ |
| Fax | fax |
Customer Activation
You can use the Result Approval controls to activate customer accounts.
Please enable Register customer on result approval and disable Register customer on form submission in the Form Configuration section.
Approve the new submission in the Results Grid page.
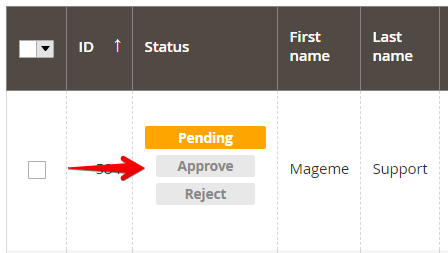
The customer account will be created after the submission status is set to Approved.
Email Notifications
You can configure approval email notifications in Result Approval Settings tab of the form.
Registration With Group Selector
Let's create a simple registration page with the customer group selector.
Please see a live example here: online demo
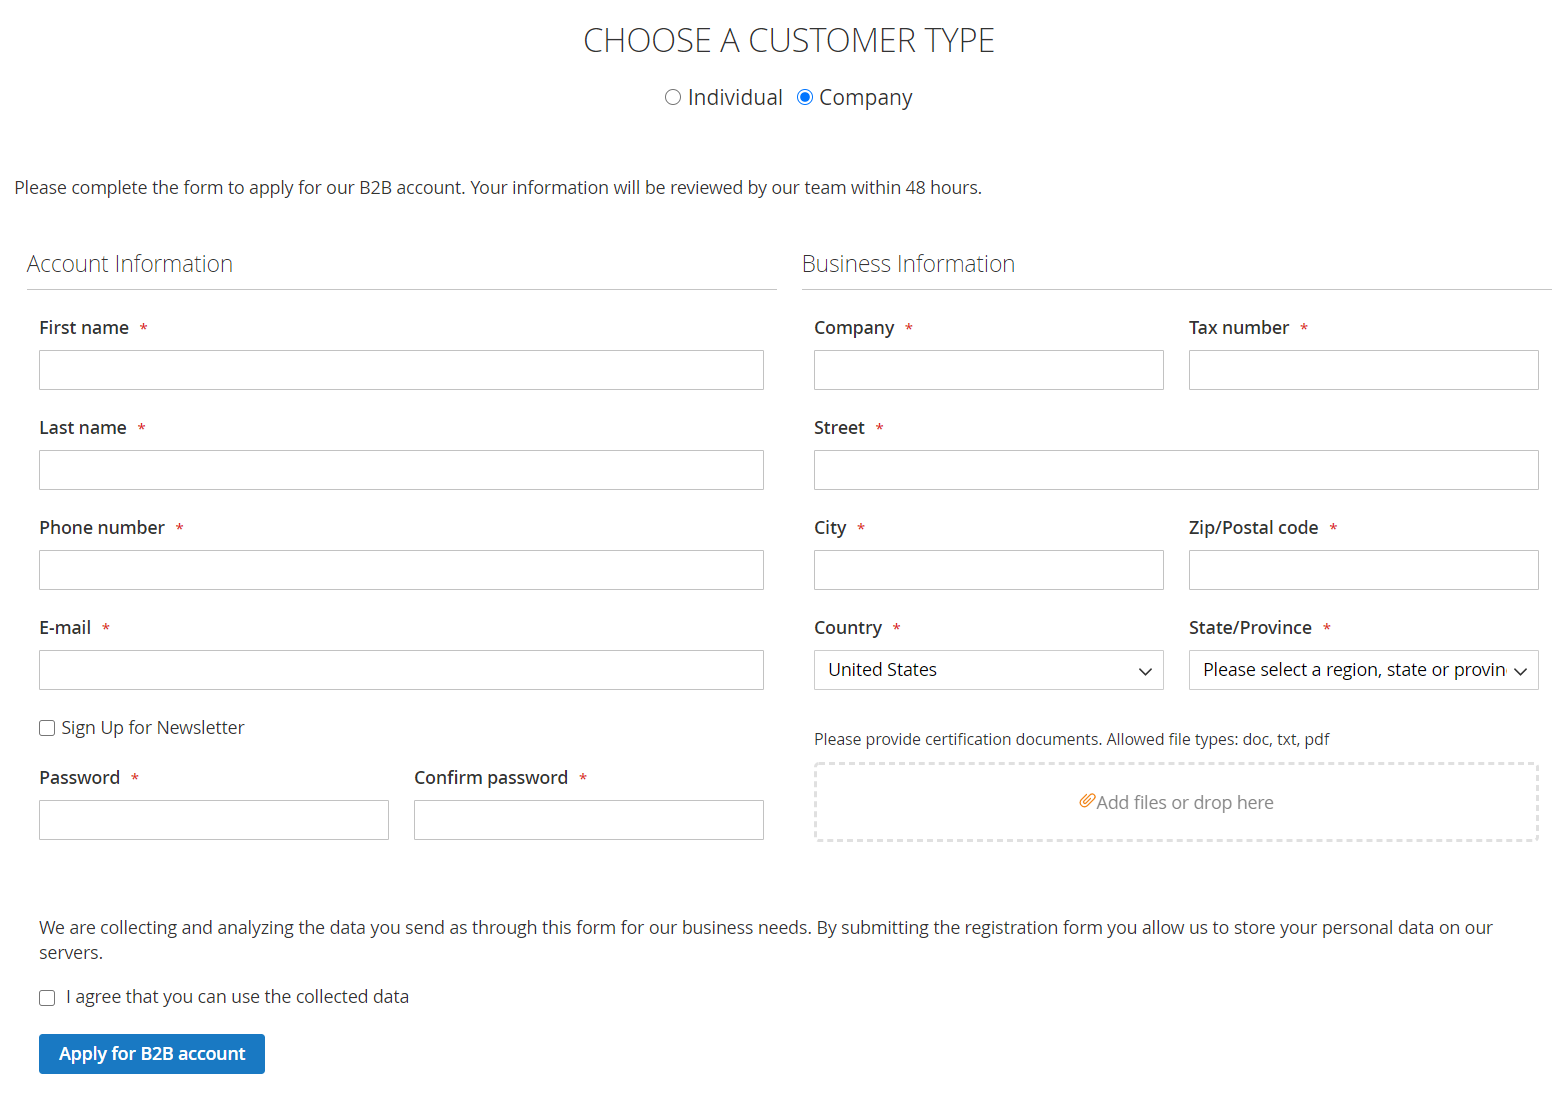
Create registration forms
-
Create forms for each account type.
-
Configure registration parameters of each form in the Form Configuration section.
You can quickly create forms by importing them from the sample forms folder from the plugin zip archive or from the Sample forms section above.
Create new CMS page
Create new CMS page from the Content > Pages admin section.
Turn off the visual editor!
Insert the following code in the Content area;
<div class="customer-type-select">
<h2 class="mb-4 text-2xl">CHOOSE A CUSTOMER TYPE</h2>
<input id="select1" value="1" name="group" type="radio" class="mx-2"/><label for="select1">Individual</label>
<input id="select2" value="2" name="group" type="radio" class="mx-2"/><label for="select2">Business</label>
</div>
<div id="form1" class="group-registration" style="display:none">
{{widget type="MageMe\WebForms\Block\Widget\Form" form_id="24"}}
</div>
<div id="form2" class="group-registration" style="display:none">
{{widget type="MageMe\WebForms\Block\Widget\Form" form_id="23"}}
</div>
<script>
document.querySelectorAll('.customer-type-select input').forEach( el => {
el.onchange = () => {
document.querySelectorAll('.group-registration').forEach( el => el.style.display = 'none');
document.getElementById('form'+el.value).style.display = 'block';
}
});
</script>
form_id="1" - ID of the web-form for Individual accounts.
form_id="2" - ID of the web-form for Company accounts.
Rewrite default registration page
Replace the default registration page with the custom CMS page from the Marketing > URL Rewrites admin section.
-
Create new rule by clicking on the Add URL Rewrite button.
-
Specify parameters:
-
Request Path = customer/account/create
-
Target Path = /Your CMS Page url key/
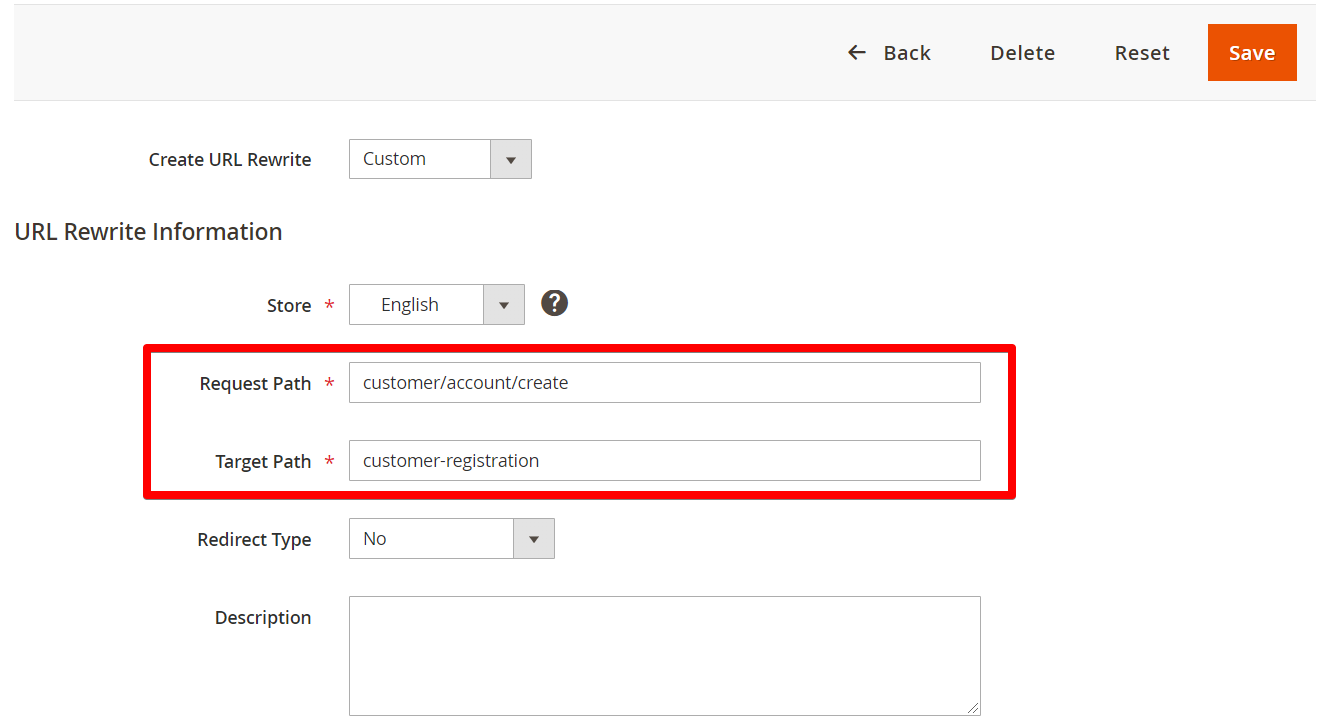
- Save the rule.